The Best Way to Setup Your Smart Ring Today
I remember the afternoon my first smart ring arrived. I’d spent weeks obsessing over sizing kits, sliding plastic hoops onto my fingers at different times of the day to account for how my knuckles swell after a salty dinner or a morning run. When the actual ring—a sleek, titanium Oura—finally landed on my doorstep, I was so excited I almost bricked it within the first ten minutes.
Most people think that to setup your Smart Ring, you just slide it on and open an app. In reality, these tiny pieces of engineering are far more temperamental than a smartwatch. Because they lack a screen, they rely entirely on a delicate dance between Bluetooth Low Energy (BLE) protocols and your phone’s background refresh settings. If you don’t get the handshake right from the jump, you’ll be plagued by “Device Not Found” errors for weeks.
Here is the no-nonsense, insider’s roadmap to getting your ring up and running, based on my years of testing everything from the Samsung Galaxy Ring to the UltraHuman and RingConn.
The Unboxing Ritual: More Than Just Cardboard
When you crack open that box, you’ll usually find the ring nestled in a charging cradle. Here is the first bit of insider knowledge: Do not try to pair it straight out of the box. Even if the app says it has 40% battery, smart rings often ship in a “deep sleep” shipping mode. This mode is designed to protect the tiny lithium-polymer battery during its journey from the factory. To wake the ring up properly, you usually need to place it on its dedicated charger. I’ve seen dozens of users think their ring is a “dud” simply because they didn’t realize the charger acts as the “on” switch.
Connect the cradle to a low-voltage power source (a laptop USB port is actually safer than a high-speed phone brick) and wait for the LED to pulse. While that’s happening, let’s prep your phone.
Preparing Your Phone (Android vs. iPhone)
The “setup your Smart Ring” process varies significantly depending on your OS. In my experience, iPhones are more restrictive with background data, while Androids can be aggressive about killing “inactive” apps to save battery.
For the iPhone Crowd
Apple’s “walled garden” loves its own products, but third-party rings have to work a bit harder.
- Bluetooth Privacy: Go to Settings > Privacy & Security > Bluetooth and make sure your ring’s app is toggled ON. I can’t tell you how many times a “failed pairing” was just a forgotten privacy toggle.
- Apple Health Integration: Most rings (Oura, RingConn, etc.) want to write data to Apple Health. Enable this during setup, but be picky. If you already have an Apple Watch, you might want to disable “Steps” from the ring to avoid double-counting, which is a common headache.
- Background App Refresh: This is the big one. Go to Settings > General > Background App Refresh and ensure it’s on for your ring app. Without this, your ring won’t sync your sleep data while you’re making coffee in the morning.
For the Android Faithful
Android gives you more freedom, but that comes with the risk of the system “putting the app to sleep.”
- Battery Optimization: Go into your app settings and set the ring’s companion app to “Unrestricted.” If you leave it on “Optimized,” Android will eventually kill the connection to save 1% of battery, and you’ll wonder why your heart rate stats haven’t updated in six hours.
- Location Services: This is a weird quirk of Android’s Bluetooth protocol. To setup your Smart Ring and pair it via Bluetooth, Android often requires “Fine Location” permissions to be enabled. It feels like an invasion of privacy, but it’s actually a technical requirement for the phone to “see” nearby BLE devices.
- Samsung Specifics: If you’re using the new Galaxy Ring, the integration with Samsung Health is almost invisible. It’s the easiest setup on the market, but it’s heavily tethered to the Samsung ecosystem.
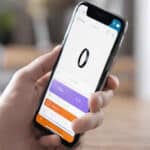
The Pairing Dance
Now that the ring is awake and the phone is ready, open the app. You’ll likely see a “Search for Ring” screen.
Pro Tip from the Field: If the app doesn’t see the ring within 30 seconds, don’t keep hitting “Retry.” Take the ring off the charger, wait five seconds, and put it back on. This “re-seats” the connection and forces the ring to broadcast its Bluetooth signal again.
I once spent forty minutes trying to pair a Circular ring until I realized that my tablet in the other room had “grabbed” the signal first. Bluetooth is a jealous lover; ensure no other devices are trying to connect to the ring during this initial phase.
Calibration: The Two-Week Rule
Once you’re paired, you’ll probably see some numbers. Don’t trust them.
Smart rings are not like thermometers; they are pattern-recognition engines. During the first 14 days after you setup your Smart Ring, the sensors are learning your “baselines.” Your resting heart rate (RHR) might look high, or your sleep stages might seem off.
Industry insiders call this the “calibration window.” The algorithms are currently building a profile of your unique finger physiology—how deep your capillaries are and how your skin temperature fluctuates. If you judge the ring based on the first three nights, you’re looking at raw, unrefined data. Stay patient.
Finger Placement and Sensor Alignment
This is where most people fail. Every smart ring has “the bump”—a series of small protrusions on the inner band where the PPG (photoplethysmography) sensors live.
To get accurate data, these sensors must be on the palm side of your finger. If the ring rotates during the night, your data will be junk.
- The Index Finger: Best for “active” tracking and heart rate accuracy.
- The Middle Finger: The best balance of comfort and data.
- The Ring Finger: Usually the most comfortable, but can be less accurate due to the proximity of the pinky.
I personally wear mine on my non-dominant index finger. It’s out of the way when I’m writing or using a mouse, but the fleshy part of that finger provides a perfect seal for the infrared lights to read my blood flow.
Detailed Walkthrough: Samsung Galaxy Ring
Samsung has made the process of how to setup your Smart Ring remarkably smooth, provided you are in their ecosystem.
When I first opened the Galaxy Ring, I noticed it uses the Samsung Wearable app, the same one used for Buds and Watches. If you have a Galaxy phone, a pop-up usually appears the second you dock the ring in its charging case. This is “Nearby Device Scanning” at work.
- The Pop-up: Tap “Connect.”
- The Update: Almost immediately, the app will download a “plugin.” This is specific software that tells your phone how to talk to this specific ring.
- Samsung Health: You must have a Samsung account. During the setup your Smart Ring phase, it will ask to sync with Samsung Health. Say yes, because the ring itself doesn’t have a standalone app for data viewing; it all lives inside the Health app.
- The Gesture Setup: One unique feature here is the “Double Pinch” gesture. The app will walk you through a calibration where you tap your index finger and thumb together. This allows you to dismiss alarms or take photos. Don’t skip this calibration—if you don’t do it now, the ring’s accelerometer won’t learn the “snap” of your specific hand movement.
Detailed Walkthrough: Oura Ring (Gen 3)
Oura is the veteran in the room. Their setup is polished but heavily focused on the subscription model.
- Account Creation: You cannot setup your Smart Ring with Oura without an account and an active subscription. Be ready to enter credit card info even if you’re on a free trial.
- The Cradle Connection: Oura is very picky about the charger. Ensure the white LED on the front of the puck is “breathing.” If it flashes red, the ring is poorly seated.
- Firmware Update: Oura almost always pushes a firmware update immediately. Insider Tip: Do not move your phone away from the ring during this. I’ve seen Oura rings enter a “boot loop” because the Bluetooth connection dropped during a 10MB update.
- The Survey: Oura will ask a dozen questions about your caffeine intake, stress levels, and chronotype (are you a morning lark or night owl?). Answer these honestly. Oura’s algorithm is more “opinionated” than Samsung’s; it will actually tell you to go to bed earlier based on these answers.
Detailed Walkthrough: RingConn
RingConn is the favorite for those who hate subscriptions. Its setup feels a bit more “techy” and less “lifestyle.”
- The Charging Case: Unlike Oura, RingConn comes with a portable charging case (like earbuds). You need to ensure the case itself is charged.
- Direct Pairing: The app uses a straightforward “Scan for Device” button. In my experience, RingConn’s Bluetooth signal is exceptionally strong, often showing up faster than the others.
- Data Frequency: Within the app settings, you can choose how often the ring checks your heart rate. If you want that “3000-word” level of data detail, set it to the highest frequency, but be prepared for the battery to drain in 4 days instead of 7.
Understanding the Tech: Red vs. Green vs. Infrared LEDs
This is where the real industry knowledge comes in. When you look at the inside of your ring, you’ll see flickering lights. To properly setup your Smart Ring and understand its data, you need to know what those colors are doing.
Green LEDs: You’ll see these mostly during the day or during workouts. Green light has a shorter wavelength and is great at penetrating through sweat and movement. It’s used for “Active Heart Rate.” However, green light doesn’t go very deep into the tissue.
Infrared (IR) and Red LEDs: These are the “Sleep” stars. Red and Infrared light have longer wavelengths that can penetrate deeper into the skin to reach the capillaries. This is how the ring measures Blood Oxygen (SpO2) and Heart Rate Variability (HRV) with clinical-grade accuracy while you’re still.
The Insider Secret: If you setup your Smart Ring and notice the green light is on all night, your ring is struggling to get a reading. This usually means the fit is too loose. The ring is “hunting” for a pulse. A perfect fit should rely almost exclusively on the invisible Infrared light during sleep, which saves massive amounts of battery.
Battery Health: The 20-80 Rule
The tiny batteries inside these rings are the most common point of failure. If you want your investment to last more than two years, stop charging it to 100% every night.
Lithium-ion cells hate being at the extremes. I’ve found the “sweet spot” is keeping the ring between 30% and 80%. My routine? I drop the ring on the charger while I’m in the shower. By the time I’ve dried off and brushed my teeth, it’s gained 15-20%, which is enough to power it for another 24 hours. This “top-up” method prevents the heat-related stress of a full 0-to-100% charge cycle.
Common Setup Pitfalls (And How to Fix Them)
Even with a perfect plan, things go sideways. Here’s a quick-fire troubleshooting list I’ve compiled from community forums and direct tech support calls:
- The “Ghost” Ring: You’ve paired it, but the app says “Disconnected.”
- The Fix: Toggle your phone’s Airplane Mode on and off. This resets the Bluetooth stack without having to restart the whole phone.
- Firmware Update Loop: The app says there’s an update, but it fails at 99%.
- The Fix: Keep the ring on the charger and keep your phone screen on. Many phones will “dim” the Bluetooth antenna to save power if the screen goes black, which kills the firmware transfer.
- Skin Irritation: You wake up with a red mark under the ring.
- The Fix: This isn’t usually an allergy; it’s “ring dermatitis.” Moisture gets trapped under the sensors. Make sure to dry your hands (and the ring) thoroughly after washing. I actually switch fingers every few days to let the skin breathe.
Beyond the Basics: Advanced Customization
Once you have managed to setup your Smart Ring, dive into the notification settings. Most modern rings (like the Circular or certain Oura iterations) have haptic motors (vibrations).
Inside Knowledge: High-intensity vibrations are the #1 battery killer. If you set your ring to buzz for every “Like” on Instagram, your battery life will drop from six days to two. I recommend turning off all notifications except for “Emergency Contacts” and “Inactivity Alerts.” Let the ring be a silent health guardian, not another nagging screen on your body.
Maintenance and Long-Term Care
Treat the sensors like a pair of expensive glasses. Every week, take a soft cloth and a tiny bit of rubbing alcohol to wipe down the inner band. Body oils, sweat, and dead skin cells can form a film over the LED covers, which forces the sensors to work harder (and use more battery) to get a reading.
Also, be careful with weightlifting. Titanium is tough, but gym bars are tougher. I’ve seen beautiful gold-finish rings get shredded in one “leg day” session. If you’re hitting the weights, either wear a silicone “ring protector” or just leave the ring in your locker. Your “strain score” might take a hit, but your ring will stay pretty.
Integrating with Your Life
The true magic happens about a month after you setup your Smart Ring. You’ll start seeing the “Readiness Score” or “Body Battery” and realizing that that third glass of wine or that late-night Netflix binge actually has a measurable impact on your recovery.
I once used my ring data to prove to myself that my “overtrained” feeling wasn’t just laziness—my Heart Rate Variability (HRV) had cratered for four straight days. That data gave me the “permission” to take a rest day. That’s the real value of these devices: they turn “feelings” into “facts.”
Why the Setup Matters
Doing the work to properly setup your Smart Ring isn’t just about making sure it works today; it’s about ensuring the data you collect for the next three years is consistent. If you start with a bad fit or a sloppy app configuration, you’re building your health profile on a foundation of sand.
Take the hour. Charge it fully. Tune your phone settings. And then, most importantly, forget you’re wearing it. The best smart ring is the one that disappears into your life, quietly whispering the secrets of your biology to your phone while you sleep.
For more technical deep dives, check out the Bluetooth Special Interest Group for how BLE works, or visit the National Institutes of Health to understand the science behind PPG sensors and heart rate variability. If you’re still having trouble, the official Android Support or Apple Support pages can help with specific OS-level Bluetooth bugs.
For brand-specific troubleshooting, you can always reference the Oura Support or Samsung Health documentation, which covers the deeper software hooks that these rings use to communicate with your smartphone.
Setting up this tech is the first step toward a much deeper understanding of yourself. Enjoy the journey.
FAQ: Everything You’re Afraid to Ask
Q: Can I wear my smart ring in the shower or pool? Most rings are rated for 50m to 100m of water resistance (IP68 or better). However, hot tubs are a different story. The heat can cause the metal to expand differently than the internal resin, potentially breaking the waterproof seal. I always take mine off for hot baths or saunas.
Q: Does it matter which hand I use to setup your Smart Ring? Technically, your dominant hand moves more, which can lead to slightly inflated “step counts.” Most people prefer their non-dominant hand for better accuracy and fewer scratches during daily tasks like opening doors.
Q: My ring feels tight in the morning. Is that normal? Yes. Your fingers can swell up to half a size overnight. This is why you should always size your ring in the afternoon when your hands are at their largest. If it’s painfully tight, hold your hand above your heart for a minute to reduce blood flow, then use a little soapy water to slide it off.
Q: How often should I sync the app? At least once a day. Most rings can hold about 4-7 days of data in their internal “onboard memory,” but if that memory fills up, the oldest data is overwritten. Syncing every morning while you have your coffee is a good habit.
Q: Can I use the ring without a subscription? This depends on the brand. Oura requires a monthly fee for deep data. RingConn and the Galaxy Ring (currently) do not. Always check the fine print before you buy, as a “free” ring can become a $70/year commitment.
Q: Why does the red light stay on during the night? That is the Blood Oxygen sensor. It stays on for longer periods than the heart rate sensor because it needs more “samples” to get an accurate reading of your oxygen saturation. If it bothers you, most apps allow you to turn off SpO2 tracking in the settings to save battery.
Additional helpful information:
- Take a look at some popular smart rings – Comparison of Popular Smart Rings
- There are a few apps you can use with your smart ring – Smart Ring Apps – Best Apps for your Smart Ring
- It is important that you connect your smart ring to a phone – How to Connect Smart Ring to a Phone?
- Some common issues you may have with your smart ring – Top 5 Smart Ring Issues and How to Solve Them
External Links for Authoritative Sources
- Oura Ring Support: https://support.ouraring.com/hc/en-us (Excellent resource for general smart ring FAQs and troubleshooting, even if you don’t own an Oura)
- Samsung Galaxy Ring Information: https://www.samsung.com/us/rings/galaxy-ring/ (For official information on Samsung’s upcoming smart ring)
- ZDNet – Best Smart Rings: https://www.zdnet.com/article/best-smart-ring/ (Reputable tech publication for reviews and comparisons)
- Live Science – How Accurate Are Smart Rings: https://www.livescience.com/health/how-accurate-are-smart-rings-and-how-do-they-compare-to-fitness-watches (Discusses the accuracy and limitations of smart rings for health tracking)
By following this guide, you’ll be well on your way to maximizing the potential of your smart ring and integrating it seamlessly into your daily life for enhanced wellness and convenience.