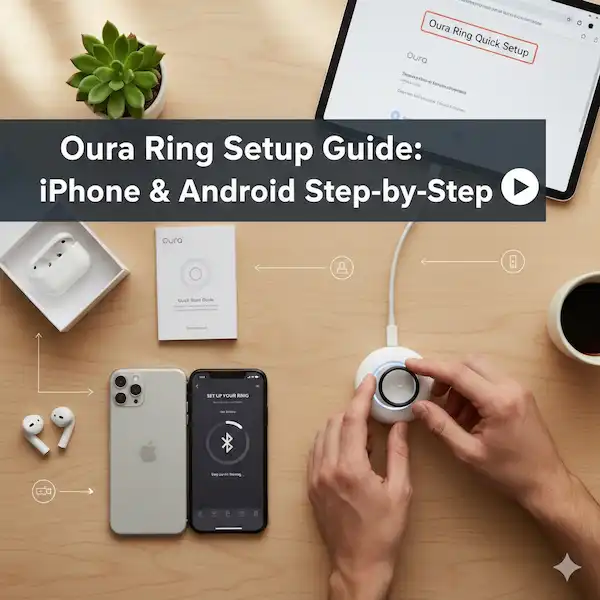
🚀 The Step-by-Step Oura Ring Setup Guide
Just unboxed your shiny new Oura Ring? That’s fantastic! You’ve taken a big step toward understanding your body, sleep, and overall readiness. Setting it up is super easy—it’s just a few simple steps on your phone.
Forget those confusing, robot-written instruction manuals. We’re going to get you from unboxing to uploading data with this friendly, human-written guide. Let’s dive in!
The process is almost identical for both Android and iPhone users. We’ll walk through it together.
Oura Ring Setup Step 1: Prep Your Ring & Phone (The Basics)
This is all about getting the hardware and software ready to talk to each other.
| Checklist | Task | Notes |
| ✅ | Unbox and Connect the Charger | Plug the USB-C cable into the charging dock, then plug the other end into a power source (like a laptop or a USB wall brick). |
| ✅ | Charge Your Ring | Place your Oura Ring on the charger. You should see a pulsing white light (or sometimes blue initially) on the charger to indicate it’s working. Charging usually takes 20-80 minutes, but you only need a little bit of charge to start the setup! |
| ✅ | Enable Bluetooth | Make sure Bluetooth is turned on in your phone’s settings. (Your phone needs to “see” the ring.) |
💡 Quick Tip: The ring’s sensor bumps should align with the small notch or light on the charger base, depending on your ring generation. Once it’s charging, the light will turn green when it’s fully charged!
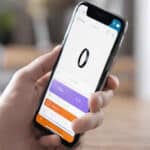
Oura Ring Setup Step 2: Download the Oura App & Create Your Account
Your data is all accessed through the Oura App—it’s where the magic happens! Download and install the Oura app on your smartphone.
- Download the App: Head over to the Apple App Store (iPhone) or Google Play Store (Android) and search for “Oura”.
- Open and Start: Tap the Oura App icon to open it, and select “Start” or “Set Up Ring”.
- Enter Your Email: You’ll be prompted to enter the email address you want to use for your Oura account and membership.
- Agree to Terms: Review the terms and conditions and grant any necessary permissions (like opting in to receive tips/offers).
- Check Your Email! The app will send you a setup email to verify your address and complete your Oura Membership sign-up online.
- Action: Go to your email app, find the message from Oura, and click the link to “Setup Your Account.” You’ll confirm your membership details (even if you have a prepaid membership).
- Return to the App: Once you finish the web steps, go back to the Oura App and tap “Continue.”
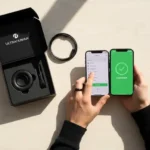
Oura Ring Setup Step 3: Pair Your Ring to Your Phone
Time to make the connection! This links your unique ring to your unique account.
- Pairing Prompt: With your ring still on the charger and its light blinking blue (indicating it’s ready to pair), the Oura App will automatically search for it.
- Confirm Pairing: When prompted by the app and your phone’s Bluetooth settings, confirm you want to pair the ring.
- Android users may be asked for location or contact access here. This is typically standard for Bluetooth devices.
- Wait for the Magic: The app will take a minute or two to connect and potentially update your ring’s firmware. This ensures you have the latest features and security updates.
Oura Ring Setup Step 4: Personalize Your Profile
This data is crucial for Oura’s algorithms to give you the most accurate, personalized scores (Readiness, Sleep, and Activity).
- Gender: (Assigned at Birth)
- Height & Weight: (Used for activity and calorie burn calculations)
- Date of Birth: (To calculate your age)
- Units: Choose between Imperial (e.g., lbs, feet) or Metric (e.g., kg, meters).
- Integrations: You’ll be asked if you want to connect to a third-party app like Apple Health (iPhone) or Health Connect (Android). We highly recommend enabling this for the best experience!
✨ You’re All Set! Once you hit “Done,” your Oura Ring is officially set up and ready to collect data.
💖 Helpful Content for New Oura Users
Getting Oura Ring Setup is just the beginning! Here are a few tips to maximize your Oura journey.
Choosing the Right Finger
You might be wondering where to put this thing! For the most accurate data, Oura recommends the following:
| Priority | Recommended Finger | Why? |
| #1 | Index Finger | Provides the most consistent contact and best circulation for heart rate sensors. |
| #2 | Middle or Ring Finger | Also acceptable, but ensure the fit is snug. |
The Sensor Rule: Always wear the ring with the three sensor bumps resting on the palm side of your finger.
Charging Routine
The Oura Ring typically lasts 4 to 7 days on a single charge. Don’t wait until it dies! Establish a quick daily charging routine.
- Charge while showering.
- Charge while doing dishes.
- Charge while working at your desk.
🔥 Pro Tip: Charging your ring for 30 minutes while you’re unwinding for the day is usually enough to top it up and ensure it doesn’t die while you’re asleep (when it collects its most important data!).
Establishing Your Baseline (The First Two Weeks)
Don’t panic if your scores look a bit wild for the first few days! Your ring needs time to get to know you. This is called calibration of your smart ring.
- What is the Baseline? This is the period (usually 14 days) where Oura learns your typical heart rate, body temperature, activity, and sleep patterns.
- What to Expect: Scores may be inconsistent. Your Readiness Score might not reflect how you feel.
- Your Job: Just wear the ring consistently, 24/7, for two full weeks. After that, your personalized scores will be much more reliable!
❓ Oura Ring Setup FAQ
Q: Why is my Oura Ring blinking blue/white/green?
| Light Color | Meaning | What to Do |
| Pulsing White/Blue | Ready to pair with the app or currently charging. | Open the Oura App to pair or wait for the light to turn solid green. |
| Solid Green | Charging is complete. | Take the ring off the charger and put it on! |
| Solid Red | Charging error or low battery on a non-charging ring. | Check the charger connection or place it back on the charger. |
Q: Do I need a membership to use my Oura Ring?
Yes. The Oura Ring requires an active Oura Membership to access the personalized Readiness, Sleep, and Activity scores, as well as the advanced features like workout tracking and guided meditations. Without it, the ring is essentially a basic step counter.
Q: Can I wear the ring in the shower or swimming?
Absolutely! The Oura Ring is durable and water-resistant up to 100 meters (328 ft). You can wear it in the shower, the bath, swimming pools, and even the sauna.
Q: What if the Oura App says, “Ring Not Connected”?
- Check Bluetooth: Make sure your phone’s Bluetooth is on.
- Force Sync: Place the ring on its charger, open the Oura App, and wait a minute for it to automatically try connecting.
- Close/Reopen: Close the Oura App completely and open it again.
- Restart Phone: If all else fails, a quick phone restart often clears up connectivity issues!
🔗Additional Helpful Links – Oura Ring Setup Guide
- Don’t forget to calibrate your new Oura Ring – Smart Ring Calibration: Initial Setup & Recalibration Guide
Authoritative External Links
For the official word, troubleshooting, and in-depth health science, check out these sources: