👋 RingConn Smart Ring Setup: A Simple Step-by-Step Guide
Just got your RingConn smart ring? That’s awesome! Getting it set up is super easy, whether you’re using an iPhone or an Android device. Think of this as your friendly, casual guide to connecting your new health-tracking buddy to your phone so you can start getting those personalized insights right away!
The basic process for RingConn Smart Ring Setup is the same for both phone types—it’s all about getting the RingConn app and pairing via Bluetooth.
🚀 The Quick-Start Checklist – RingConn Smart Ring Setup
Before you dive in, let’s make sure you’re ready to go:
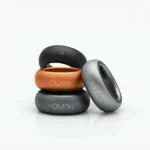
- Check the Box: You should have the RingConn Smart Ring, the Magnetic Charging Case, and a USB-C Cable.
- Size Matters (Seriously!): Make sure you’ve used the sizing kit and you have the right-sized ring. A snug fit is key for accurate data (like heart rate and sleep).
- Charge it Up: Pop your ring into the charging case and plug it in. The ring should be fully charged before its first use.
📱 RingConn Smart Ring Setup – Step-by-Step Pairing Guide (Android & iPhone)
RingConn Smart Ring Setup – Here’s the step-by-step to get your ring and phone talking to each other:
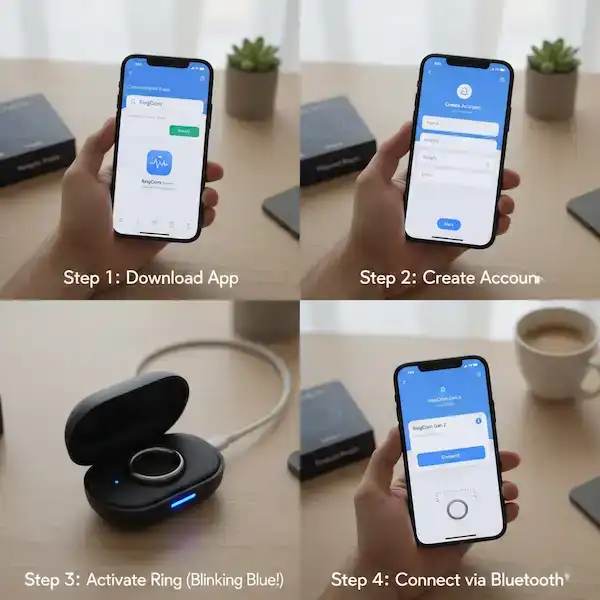
Step 1: Download the RingConn App
Downloading and installing the RingConn companion app on your smartphone is most important for RingConn Smart Ring Setup.
- For iPhone users: Head over to the Apple App Store.
- For Android users: Go to the Google Play Store.
- Search for “RingConn” and download the official RingConn Smart Health Monitoring App.
- Pro Tip: If you’re struggling to find it, check the user manual for a QR code that will take you straight to the right place!
Step 2: Create or Log In to Your Account – RingConn Smart Ring Setup
This account is for collecting ànd storing data from your RingConn smart ring. There is no charge for this account!
- Open the RingConn app.
- If you’re new, follow the on-screen prompts to create a new account. You’ll likely need to input some basic info like your name, height, and weight so the ring can personalize your data.
- If you already have an account (maybe you’re upgrading from an older model!), just log in.
Step 3: Activate the Ring
This is where your charging case comes in handy!
- Place your RingConn smart ring securely inside its magnetic charging case.
- Wait for the blue indicator light on the case to start blinking. This blinking blue light means the ring is activated and ready to pair with your phone (it’s in “pairing mode”).
- Example: If the light stays solid blue for 5 seconds, it means it’s charging normally, so you might need to try opening and closing the case again to get it to blink blue and enter pairing mode.
Step 4: Connect the Ring with the App – Very Important for RingConn Smart Ring Setup
- On your phone, make sure Bluetooth is turned ON.
- Open the RingConn app and navigate to the “Me” or “Device” section (it often has a small ring icon).
- Look for a button that says “Start Pairing” or “Bind Device.”
- The app will search for your ring. You should see your ring appear in the list (sometimes listed by its model, like Gen 2).
- Tap on your ring to select it and confirm the pairing.
- Keep Them Close: For the best connection, make sure your ring and phone are within about one meter (3 feet) of each other during this step.
Step 5: Start Your Health Journey!
- Once paired, the app will show your ring’s battery status and connection.
- The app might prompt you to read a quick user guide or start syncing with your phone’s health data platform (like Apple Health).
- Your ring is now connected! You can now wear it properly (sensors on the underside of your finger, usually the index, middle, or ring finger) and start collecting data.
💡 Additional Helpful Content & Tips
📝 Proper Ring Wear for the Best Data
Getting the right fit isn’t just about comfort; it’s about accuracy!
- Which Finger? The index, middle, or ring finger on either hand is generally recommended.
- Which Hand? Try wearing it on your non-dominant hand to reduce friction and potential damage from daily tasks.
- Sensor Placement: Ensure the sensors (the raised, flat parts on the inside) are resting on the underside of your finger (palm side) to get the most reliable readings.
❓ FAQ: Troubleshooting Common Issues – RingConn Smart Ring Setup
| Problem | Quick Fixes |
| Ring not connecting/pairing? | 1. Ensure Bluetooth is ON. 2. Close and reopen the RingConn app. 3. Restart your phone. 4. Put the ring back in the charging case to ensure it’s in blinking blue pairing mode. |
| Data not syncing? | The app needs to be opened manually to sync the data! Open the app at least once a day. (The ring can typically store up to 7 days of data before it needs to sync.) |
| Ring battery draining fast? | Ensure your ring is getting a full charge. Check the battery status in the app. Frequent, continuous high-intensity monitoring can slightly reduce life, but if it’s significantly off spec, contact support. |
| Data seems inaccurate? | Check the Fit! Is the ring snug but comfortable? Is the sensor facing your palm? Try wiping the sensors with a soft cloth. |
🔗 Additional Helpful Links – RingConn Smart Ring Setup
- Here is some help with Ringconn Problems – RingConn Problems: Solutions & Troubleshooting